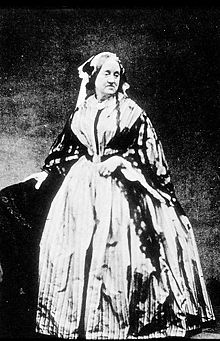
Anna AtkinsAnna Atkins is famous for her very interesting cyanotype photography in the 18th-19th century. She was actually the first person to ever publish a book with photographic images in. It is quite remarkable the fact that she is also a woman. Her works seem to focus more on nature in her cyanotype images. I have noticed that the details are quite refined in every single one, all of them seem to be outlined in a subtle way which I think helps viewers of her art appreciate the photographs even more. Anna Atkins was a friend of William Fox Talbot and so she learnt straight from him a lot of what he knew about photography. She later gained access to a camera and was claimed to have become the first female photographer. Although, as none of Anna Atkins's camera based photographs survived, the issue may never be resolved. Some of her cyanotype images can be viewed to the side.
|
|
Cyanotypes Lesson
|
In our cyanotypes lesson we learnt about cyanotypes and the process of creating our own cyanotype images. Cyanotypes are another type of blueprint, but in a photographical form. It derives from the word cyan; cyan is another shade of blue, which of course is the colour we hear of in the word "blueprint".
We were taught about cyanotype paper and what happens when it is exposed to bright/ultraviolet light, so having learned this, we all went outside to test out the process. Luckily, it was a sunny day. We were given many little assorted objects and also had the opportunity to use any of our own objects. Items from a pencil case were great for use as they were quite small and perfect to put on a piece of A5 paper. We were then given the cyanotype paper of which we quickly placed down our objects onto so that the paper did not become exposed to the sunlight too quickly, because that would ruin the whole process. After we placed on our objects, we left the paper (plus our objects) in the sunlight for a few minutes before then removing the objects. |
As we removed our items from the cyanotype paper, we noticed that the sunlight for a few minutes before then removing the objects. As we removed our items from the cyanotype paper, we noticed that the sunlight had created shadows from our objects and the shapes had been left on the paper, causing a collage of interesting shapes to appear.
We then took our cyanotypes over to the tray of water in which we placed down our papers. We left them in there for a bit, and slowly the images started to fade away, which made a few people panic slightly, but they were soon reassured that it was all part of the process. After our cyanotypes were done in the water, we then laid them out on a nearby bench which was very nicely exposed to the sunlight and dried the prints nicely. We then repeated the process. |
|
|
Evaluation
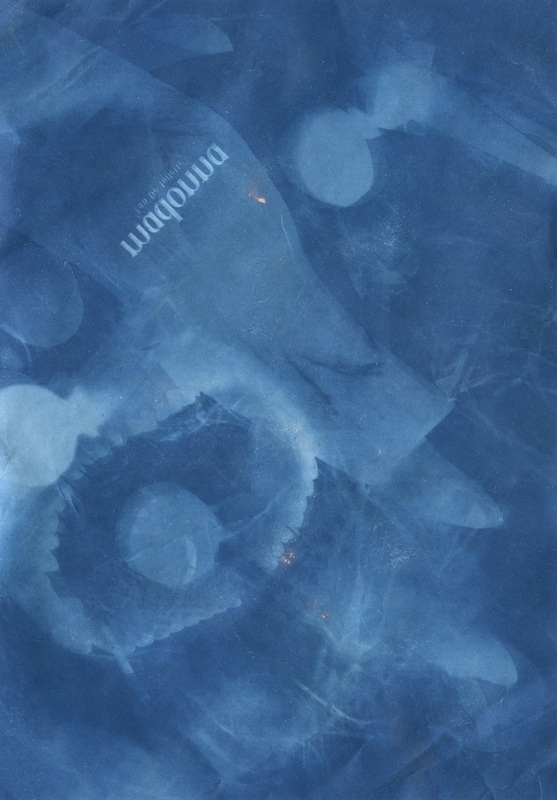
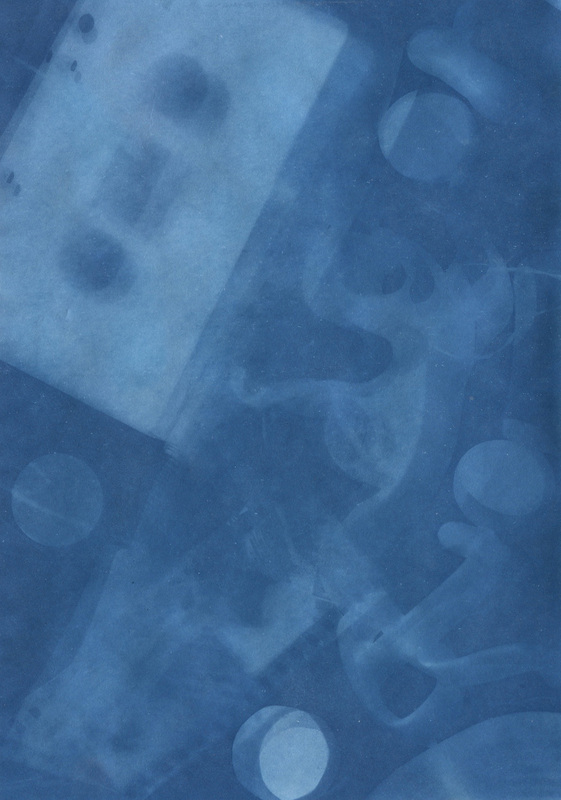
Up above are my two cyanotype images that I created in the lesson. On the left is my first image, and on the right is my second image. I think that both went reasonably well considering that it is a first and second attempt. I specifically like my second image more than my first image, as I think i put in more time and organisation into placing my objects having seeing where I went wrong with the first one. In my first image, I just messily piled everything up on the page without really considering the end result, the effects of shadows, and what different types of photographical techniques I could have thought about before creating my image. My second image has less objects piled onto the paper and is more spaced out with some objects flat on the paper and some not quite on the paper but slightly above, creating a shadowy outcast effect on the final image. To improve, next time I would take those points into consideration before the first image, in order to end up with both images nicely planned and well thought out.
